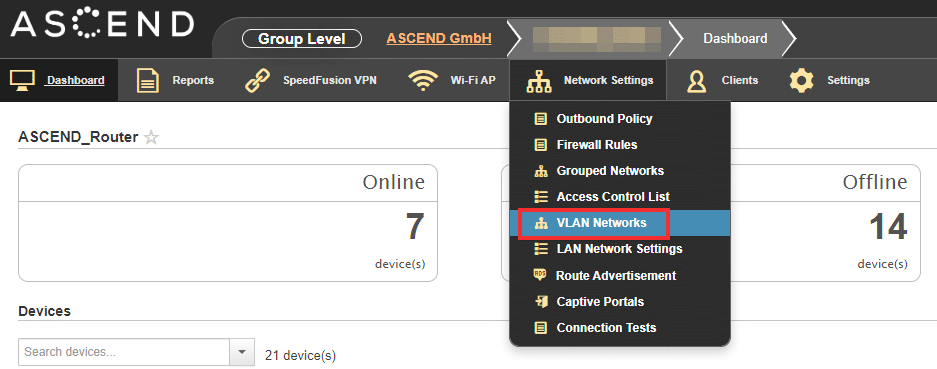
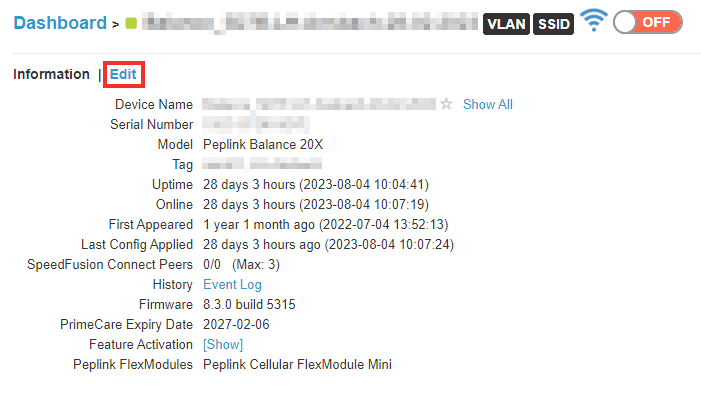
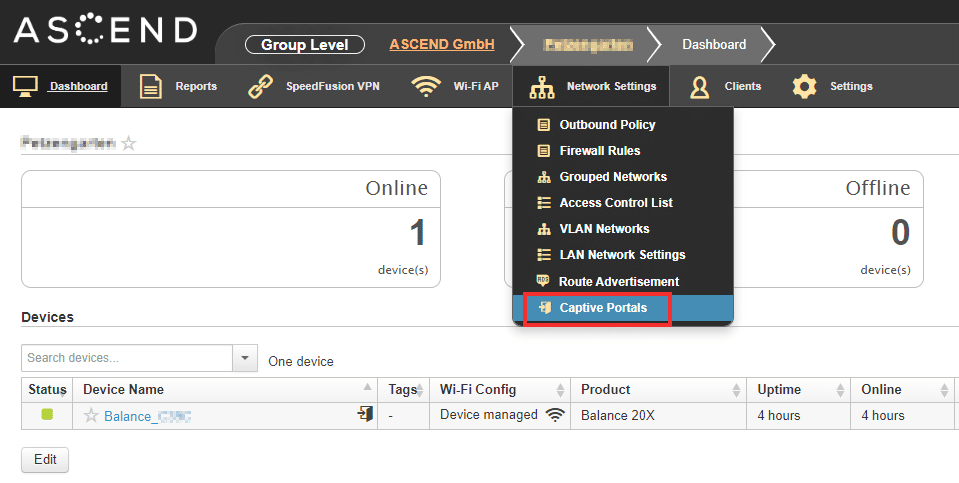
To set up a captive portal, you first need a VLAN. The VLAN can be created at group level, just like the Captive Portal. To access the existing VLANs, simply click on a device group in the dashboard. New VLANs can also be created here.
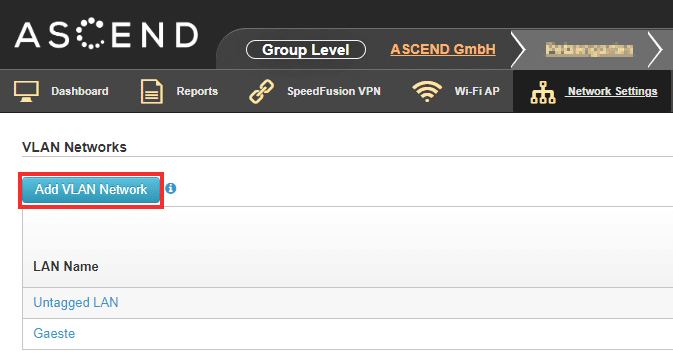
If a new VLAN needs to be created, simply click on "Add VLAN Network".
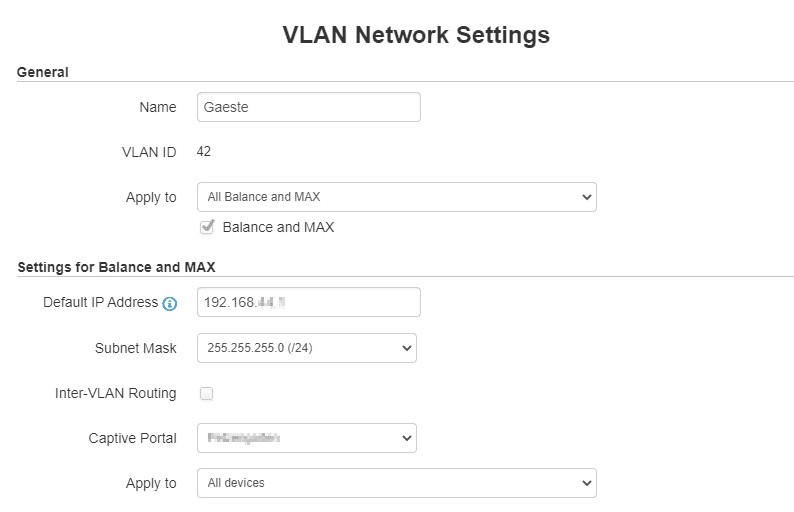
First, a name and a VLAN ID must be assigned.
Under "Apply to", you can control which devices within the group receive this VLAN. If the VLAN is only to be made available for certain devices in the group, this can be achieved by using tags. The respective device can be tagged in the device details (by clicking on the router) via "Edit".

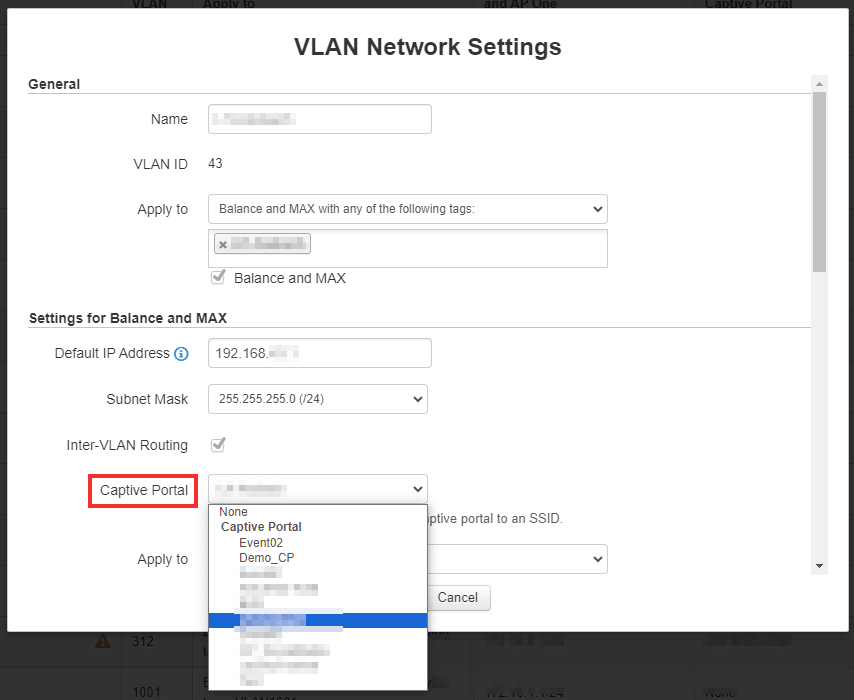
The information about which captive portal is to be used for this VLAN can be left blank if the portal has not yet been created.

A new captive portal can now be created at group level.
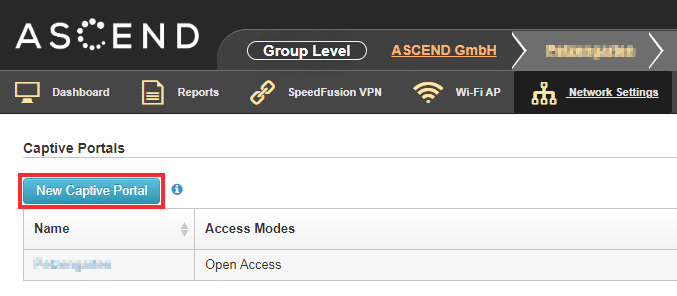
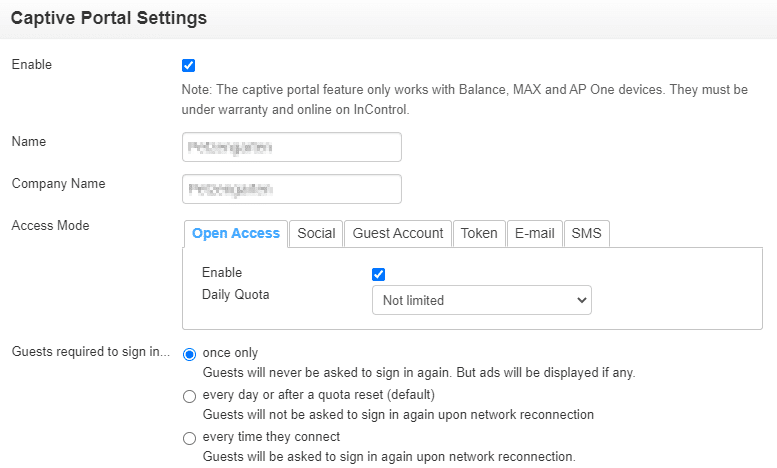
The "Open Access" access mode is best suited for testing the captive portal.


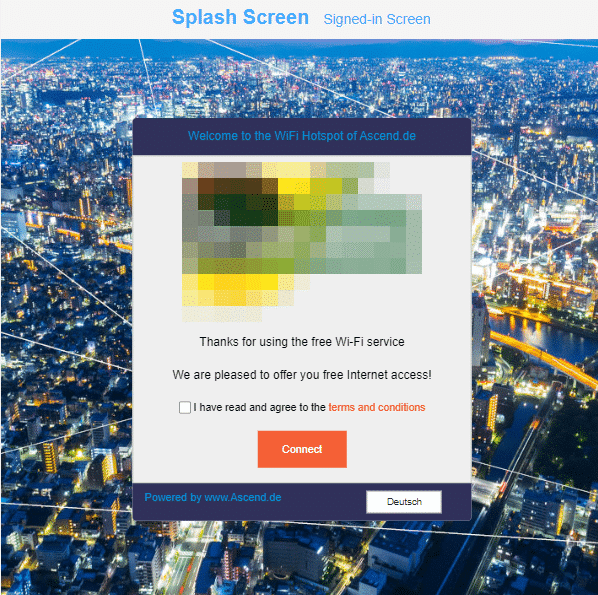
The design of the captive portal can now be customized via "Preview and Customization".

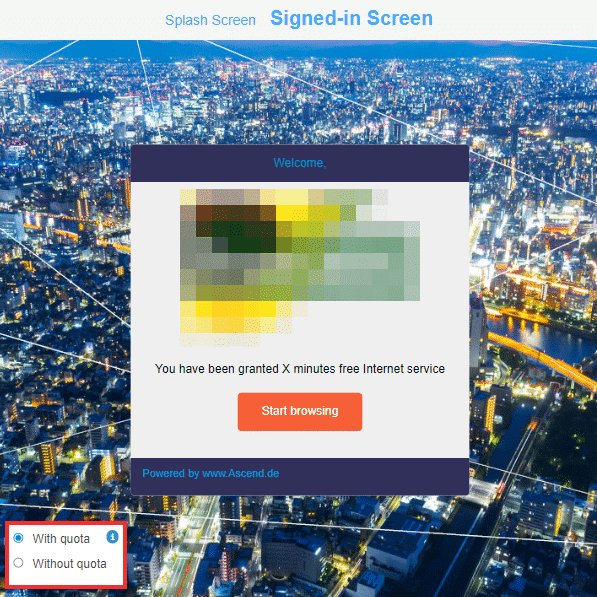
There is a splash screen and a signed-in screen.
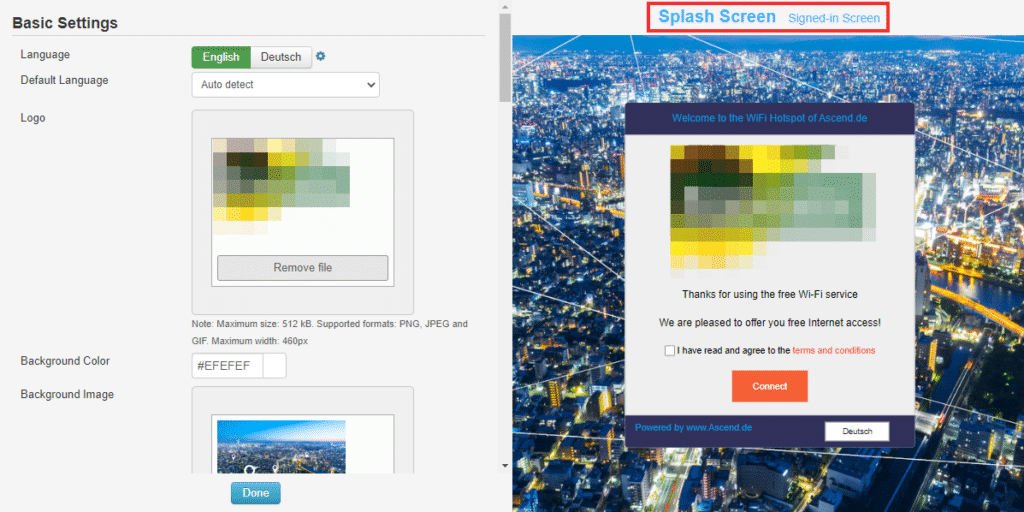
An additional language can be added using the small cogwheel.
You can also upload a logo and a background image.
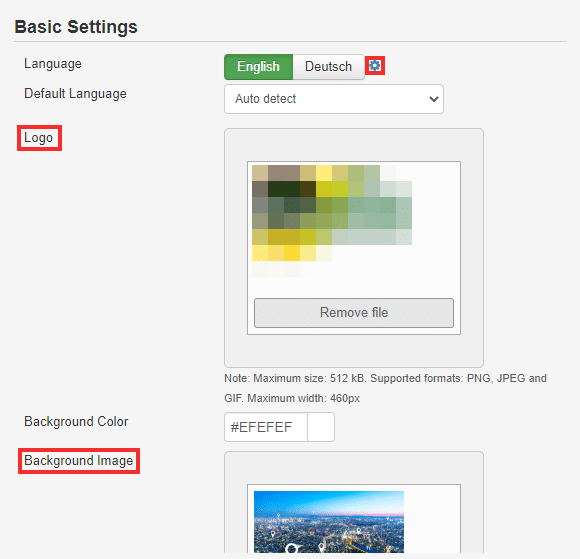
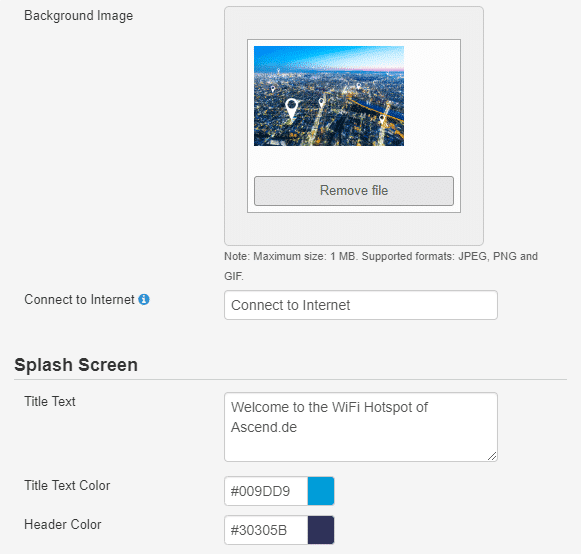
The colors are specified in HTML format (hex color code).
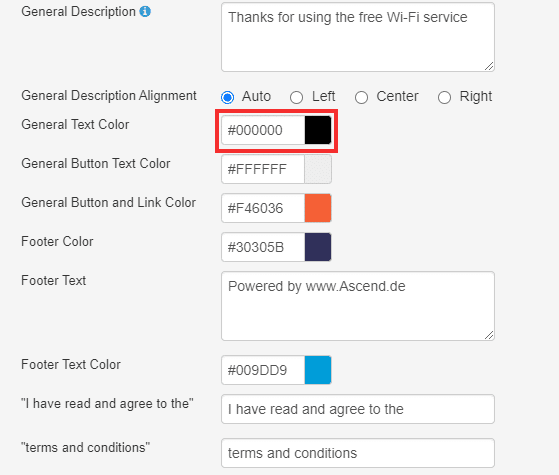
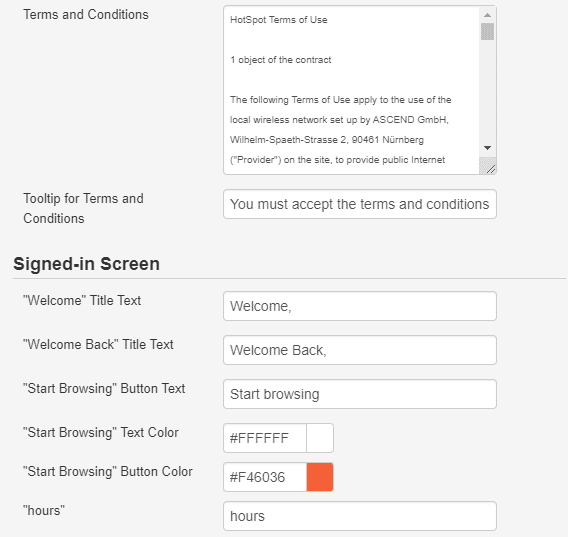
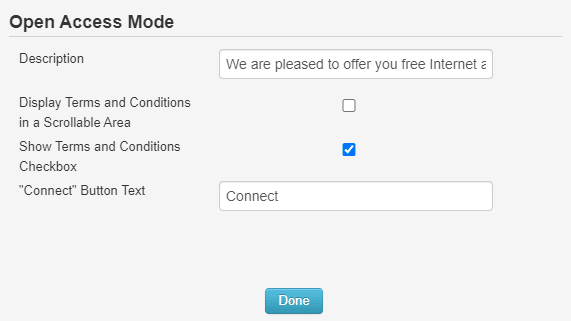
The splash screen contains the terms of use, which must be confirmed.
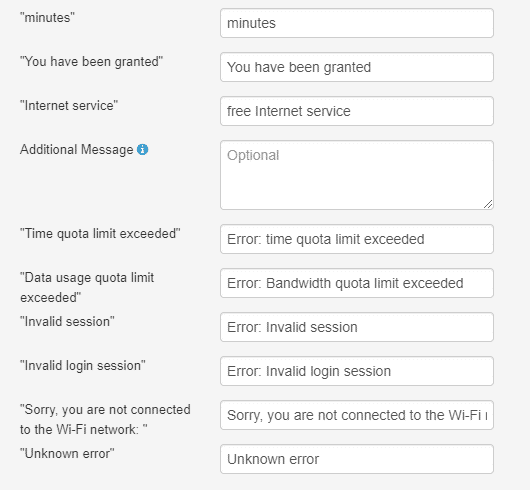
The text in the signed-in screen can be customized for connections with and without data limit.
The desired captive portal can now also be selected in the VLAN and is therefore available.